Sega Game Gear SMD Capacitors – Πυκνωτές για Sega Game Gear
14,90 €
Sega Game Gear Capacitors – Πυκνωτές για Sega Game Gear
17 σε απόθεμα
Περιγραφή
Game Gear SMD Capacitors – Πυκνωτές για Sega Game Gear
The very first job of any Game Gear repair has to be a full re-cap (or at least a decap; removing the aluminium capacitors) as they were manufactured faulty and all Game Gear capacitors will leak and fail over the time.
We offer full recap kits that work on all versions of the Game Gear console.
The first task is to simply remove all old capacitors from the main board, power board and audio board. Do this by applying new solder to the pads of the capacitors so the heat transfer is good. Use a flat screwdriver, knife or similar to gently lift up the old capacitors from the main board, as they are glued down to the PCB. Once the glue breaks loose the capacitors will lift up in the air but still be soldered down.
Apply solder again to the capacitor legs and now as you are warming both legs of the capacitor up by moving the iron side to side over both pins, left off the capacitor with tweezers. Place the new capacitors of the correct size in the locations shown here.
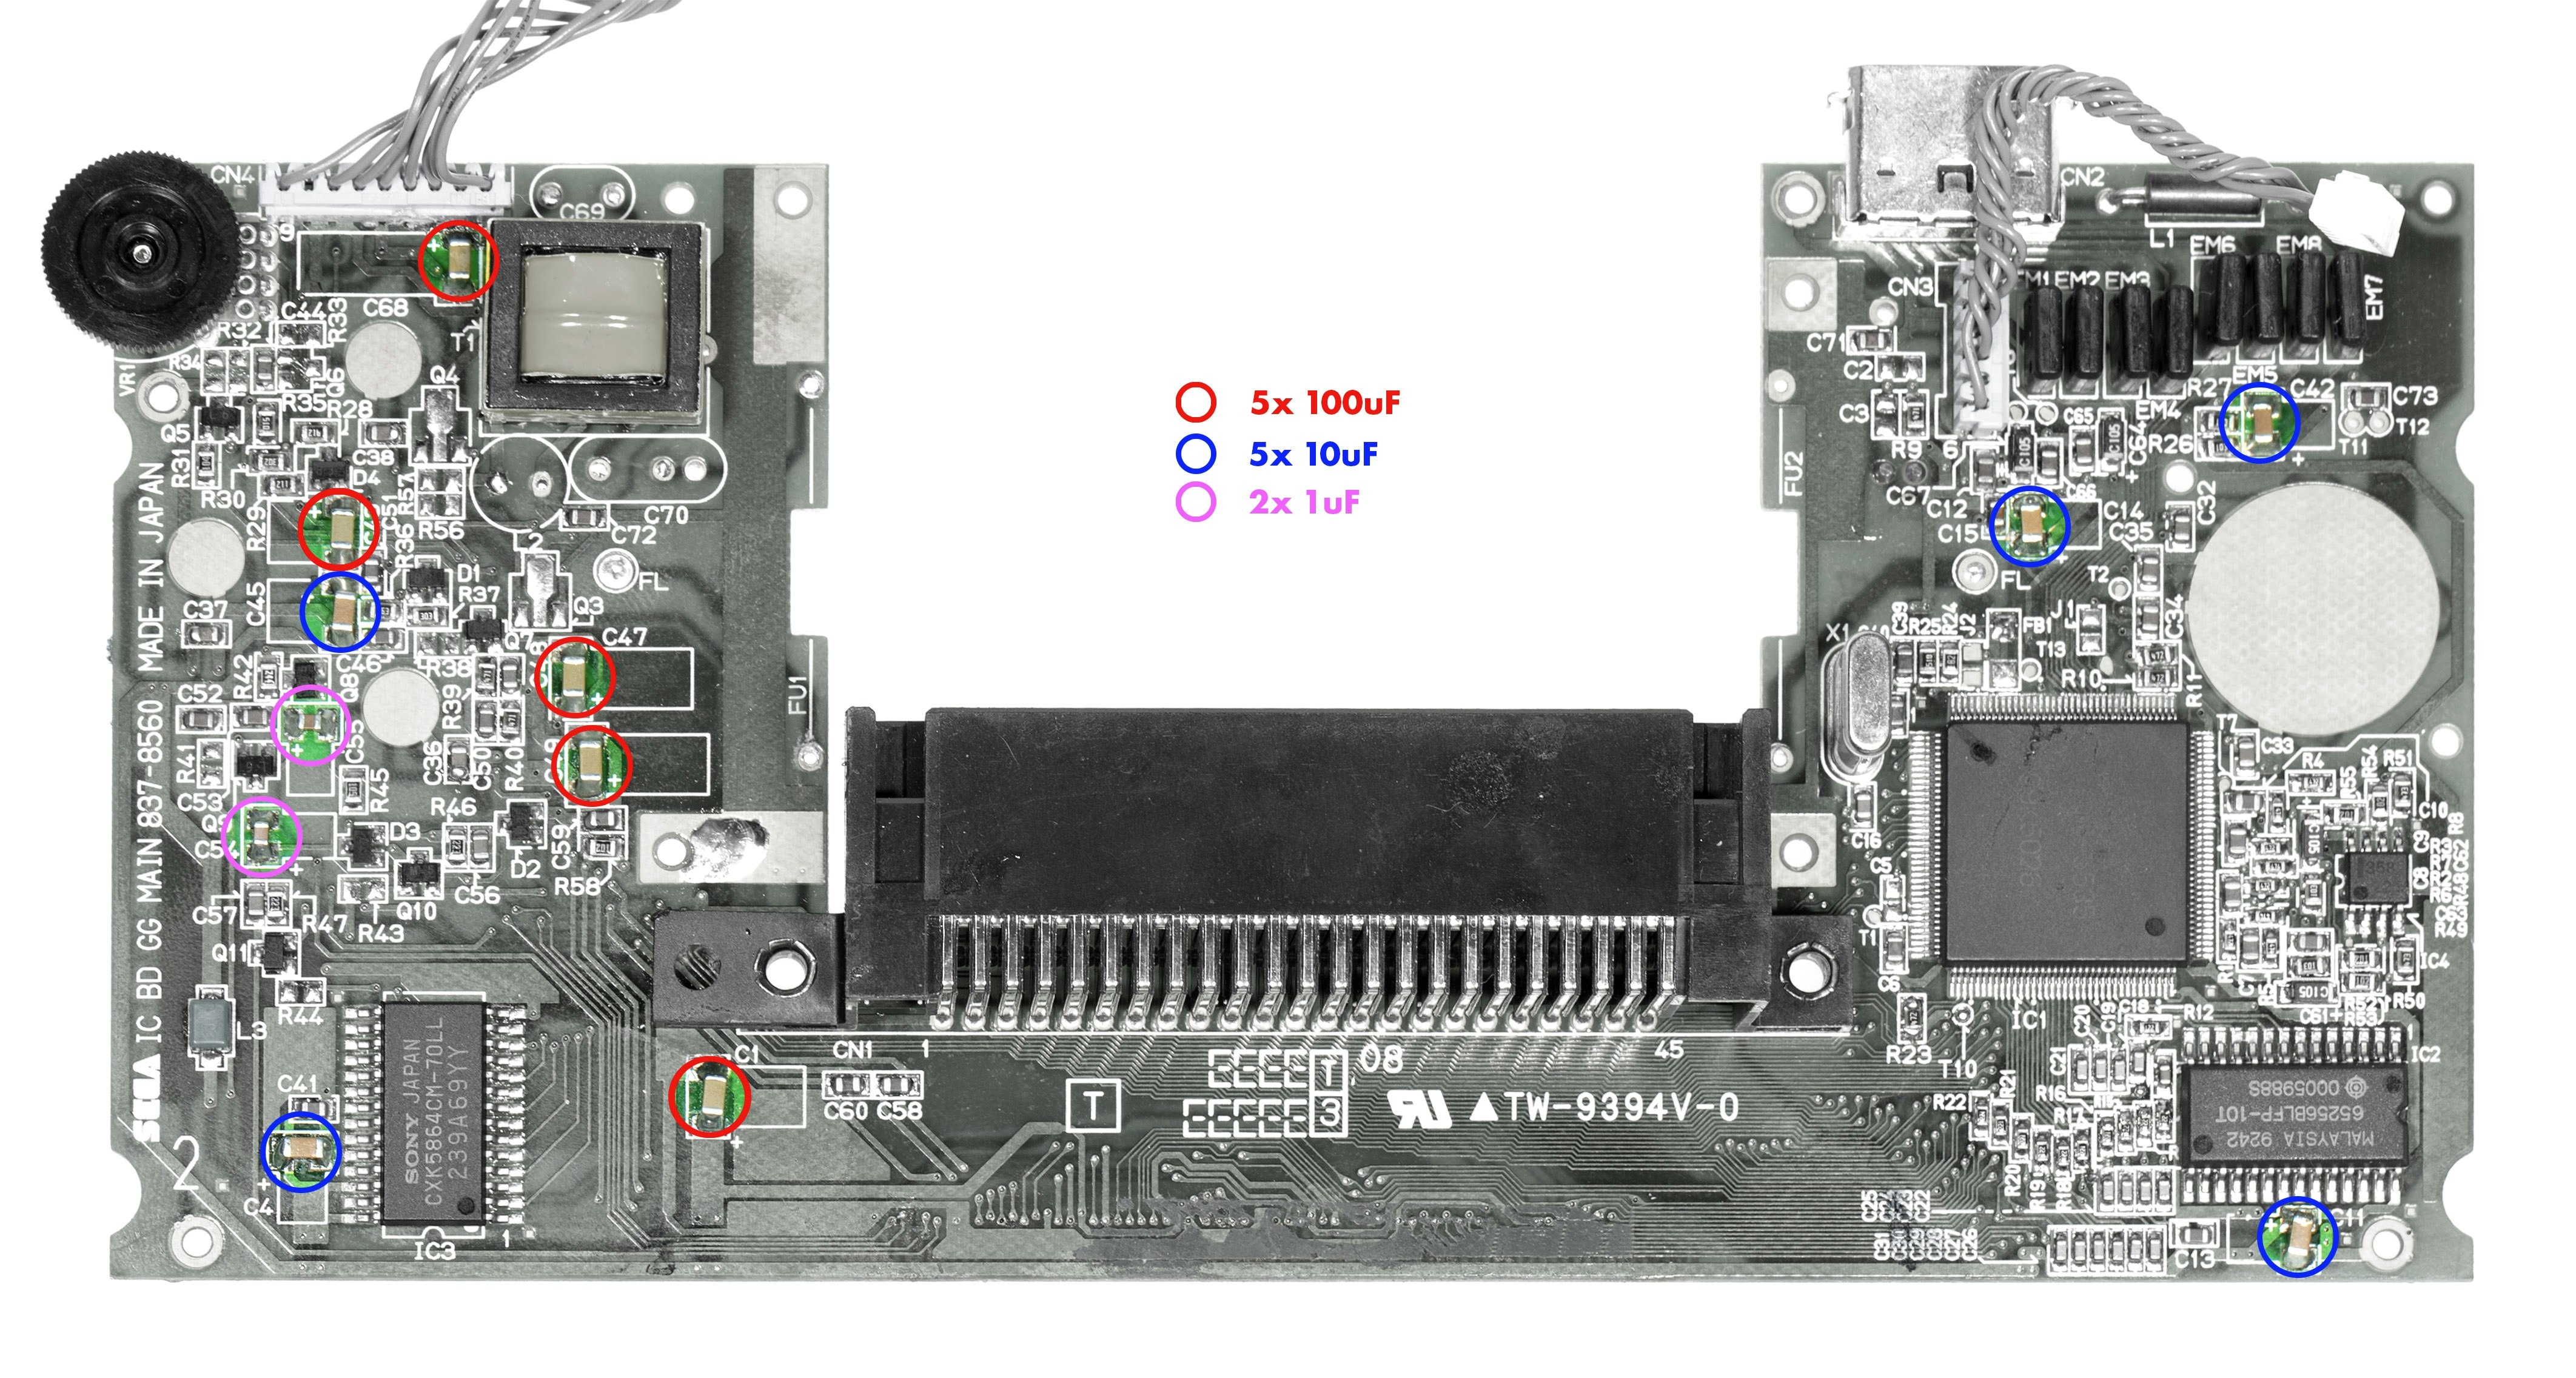
The only capacitors you need to remove are the ones in place of where the new capacitors go. If your board has two chips at the bottom left, then use these locations/values.
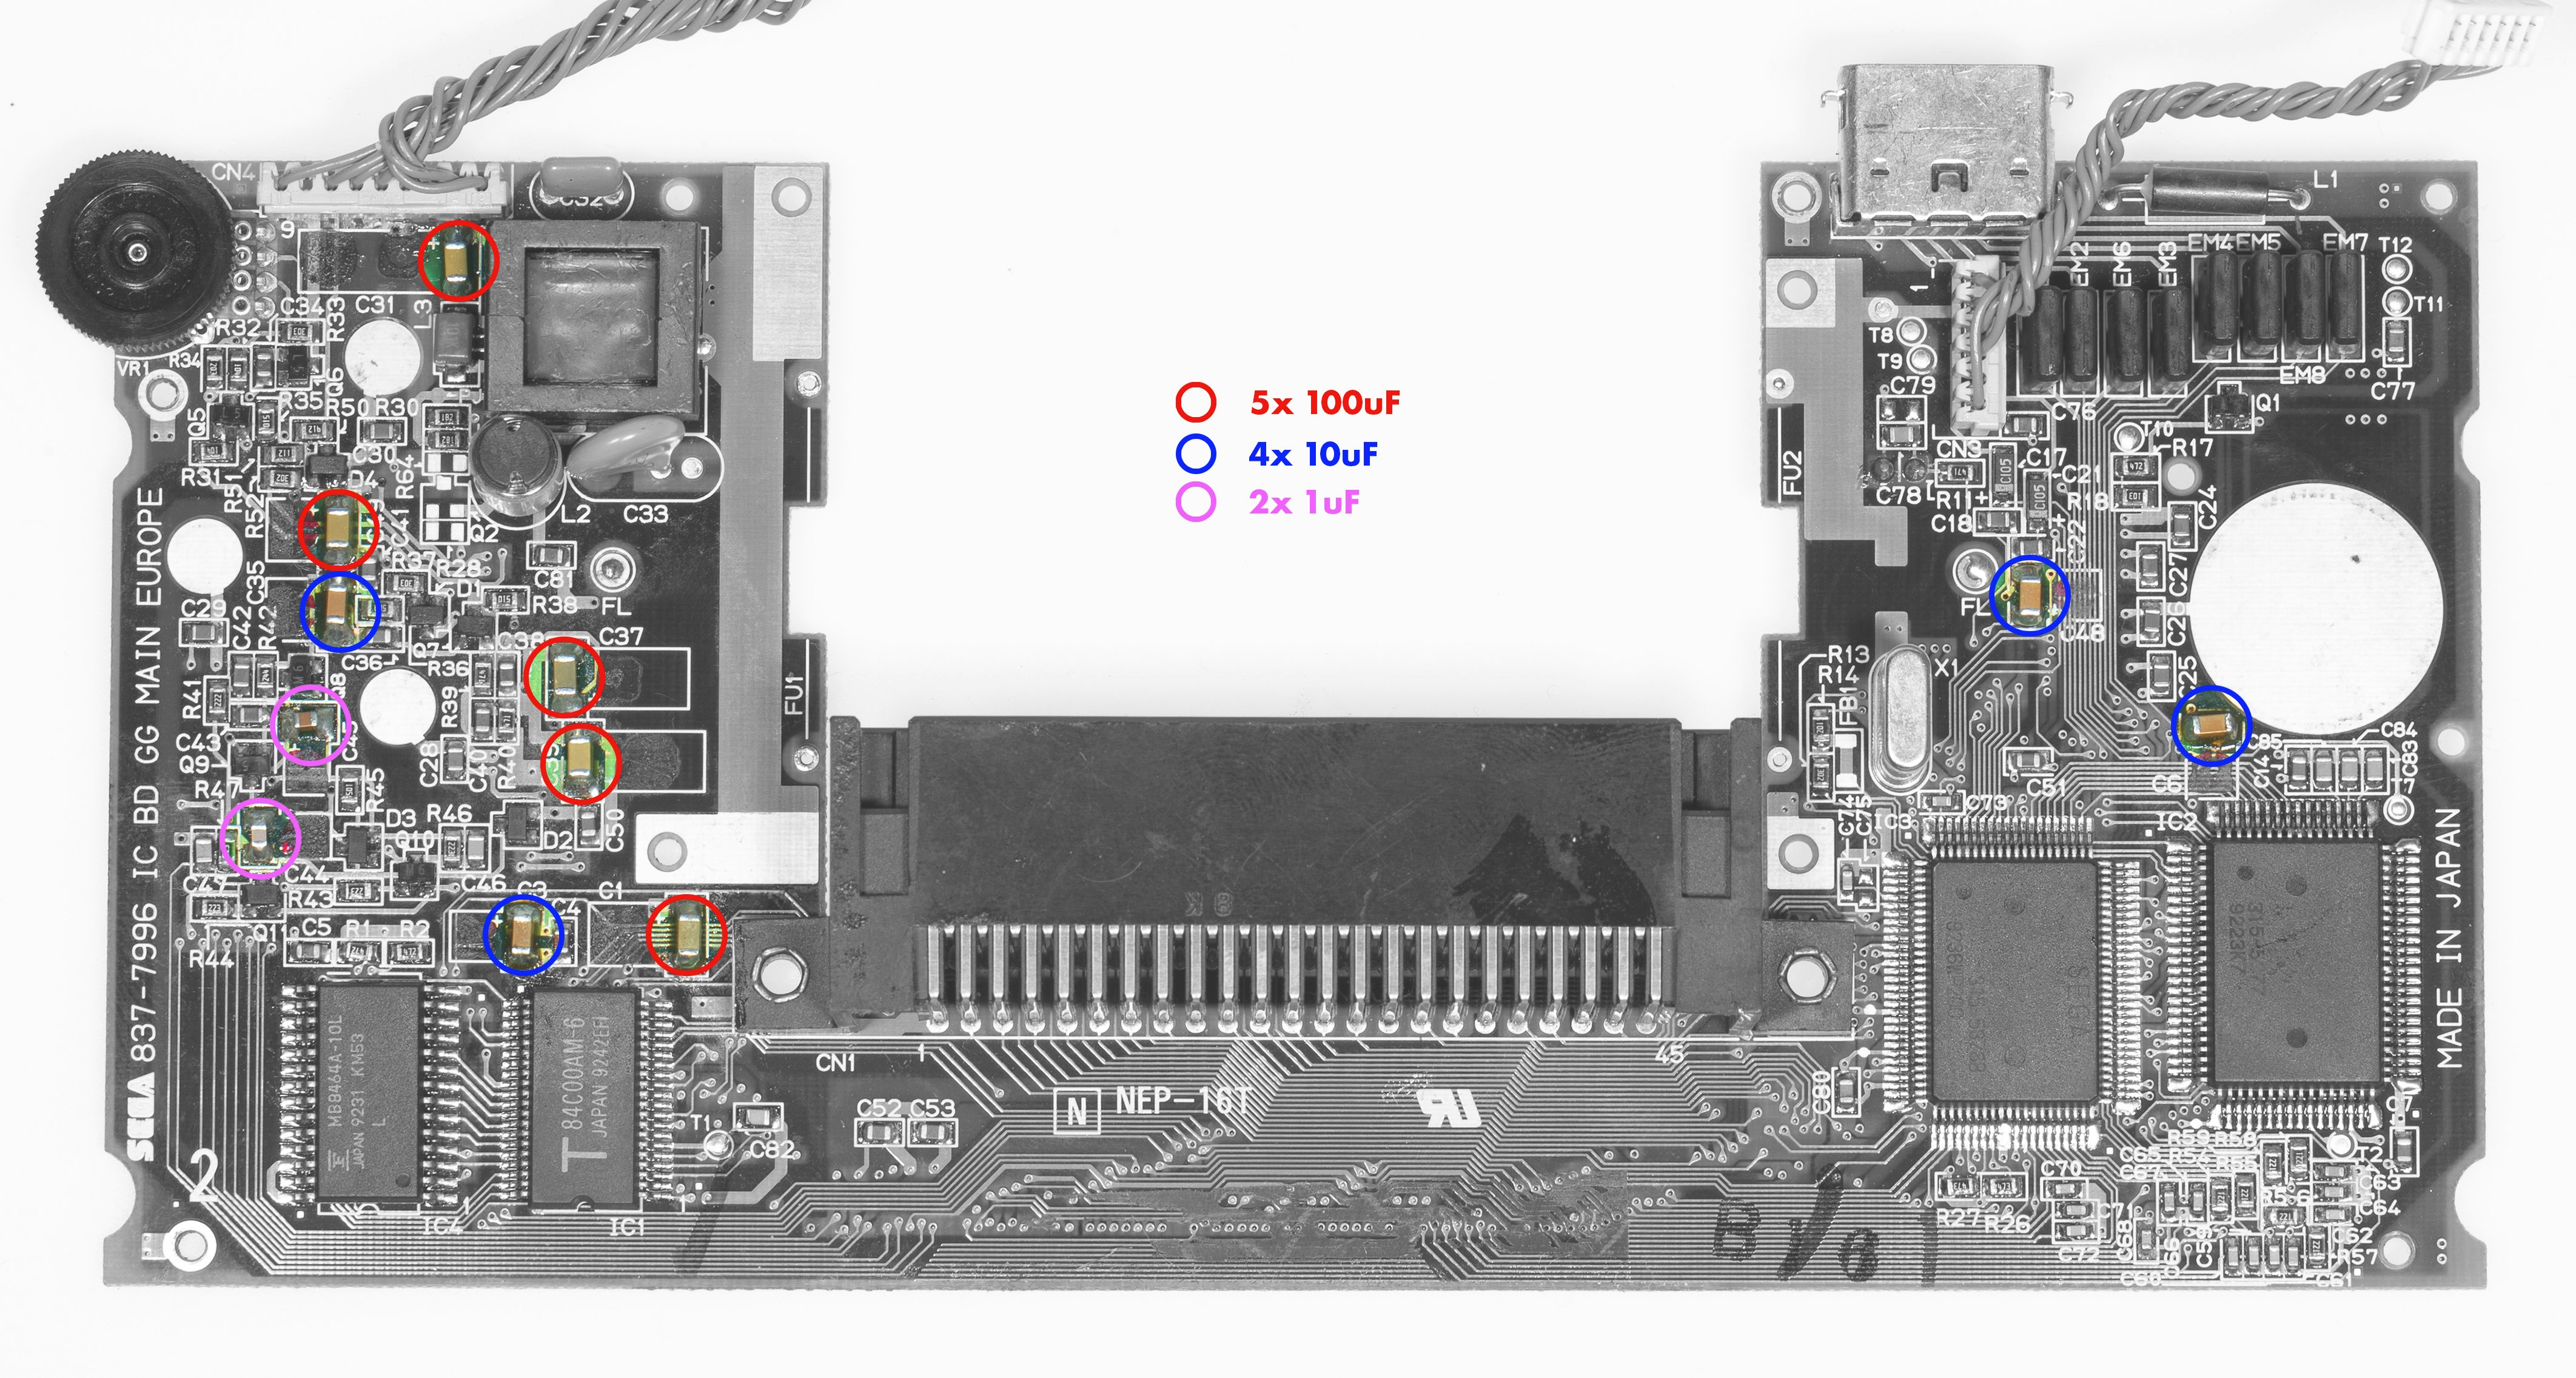
Note the new capacitors can be installed either way around, they are not polarized.
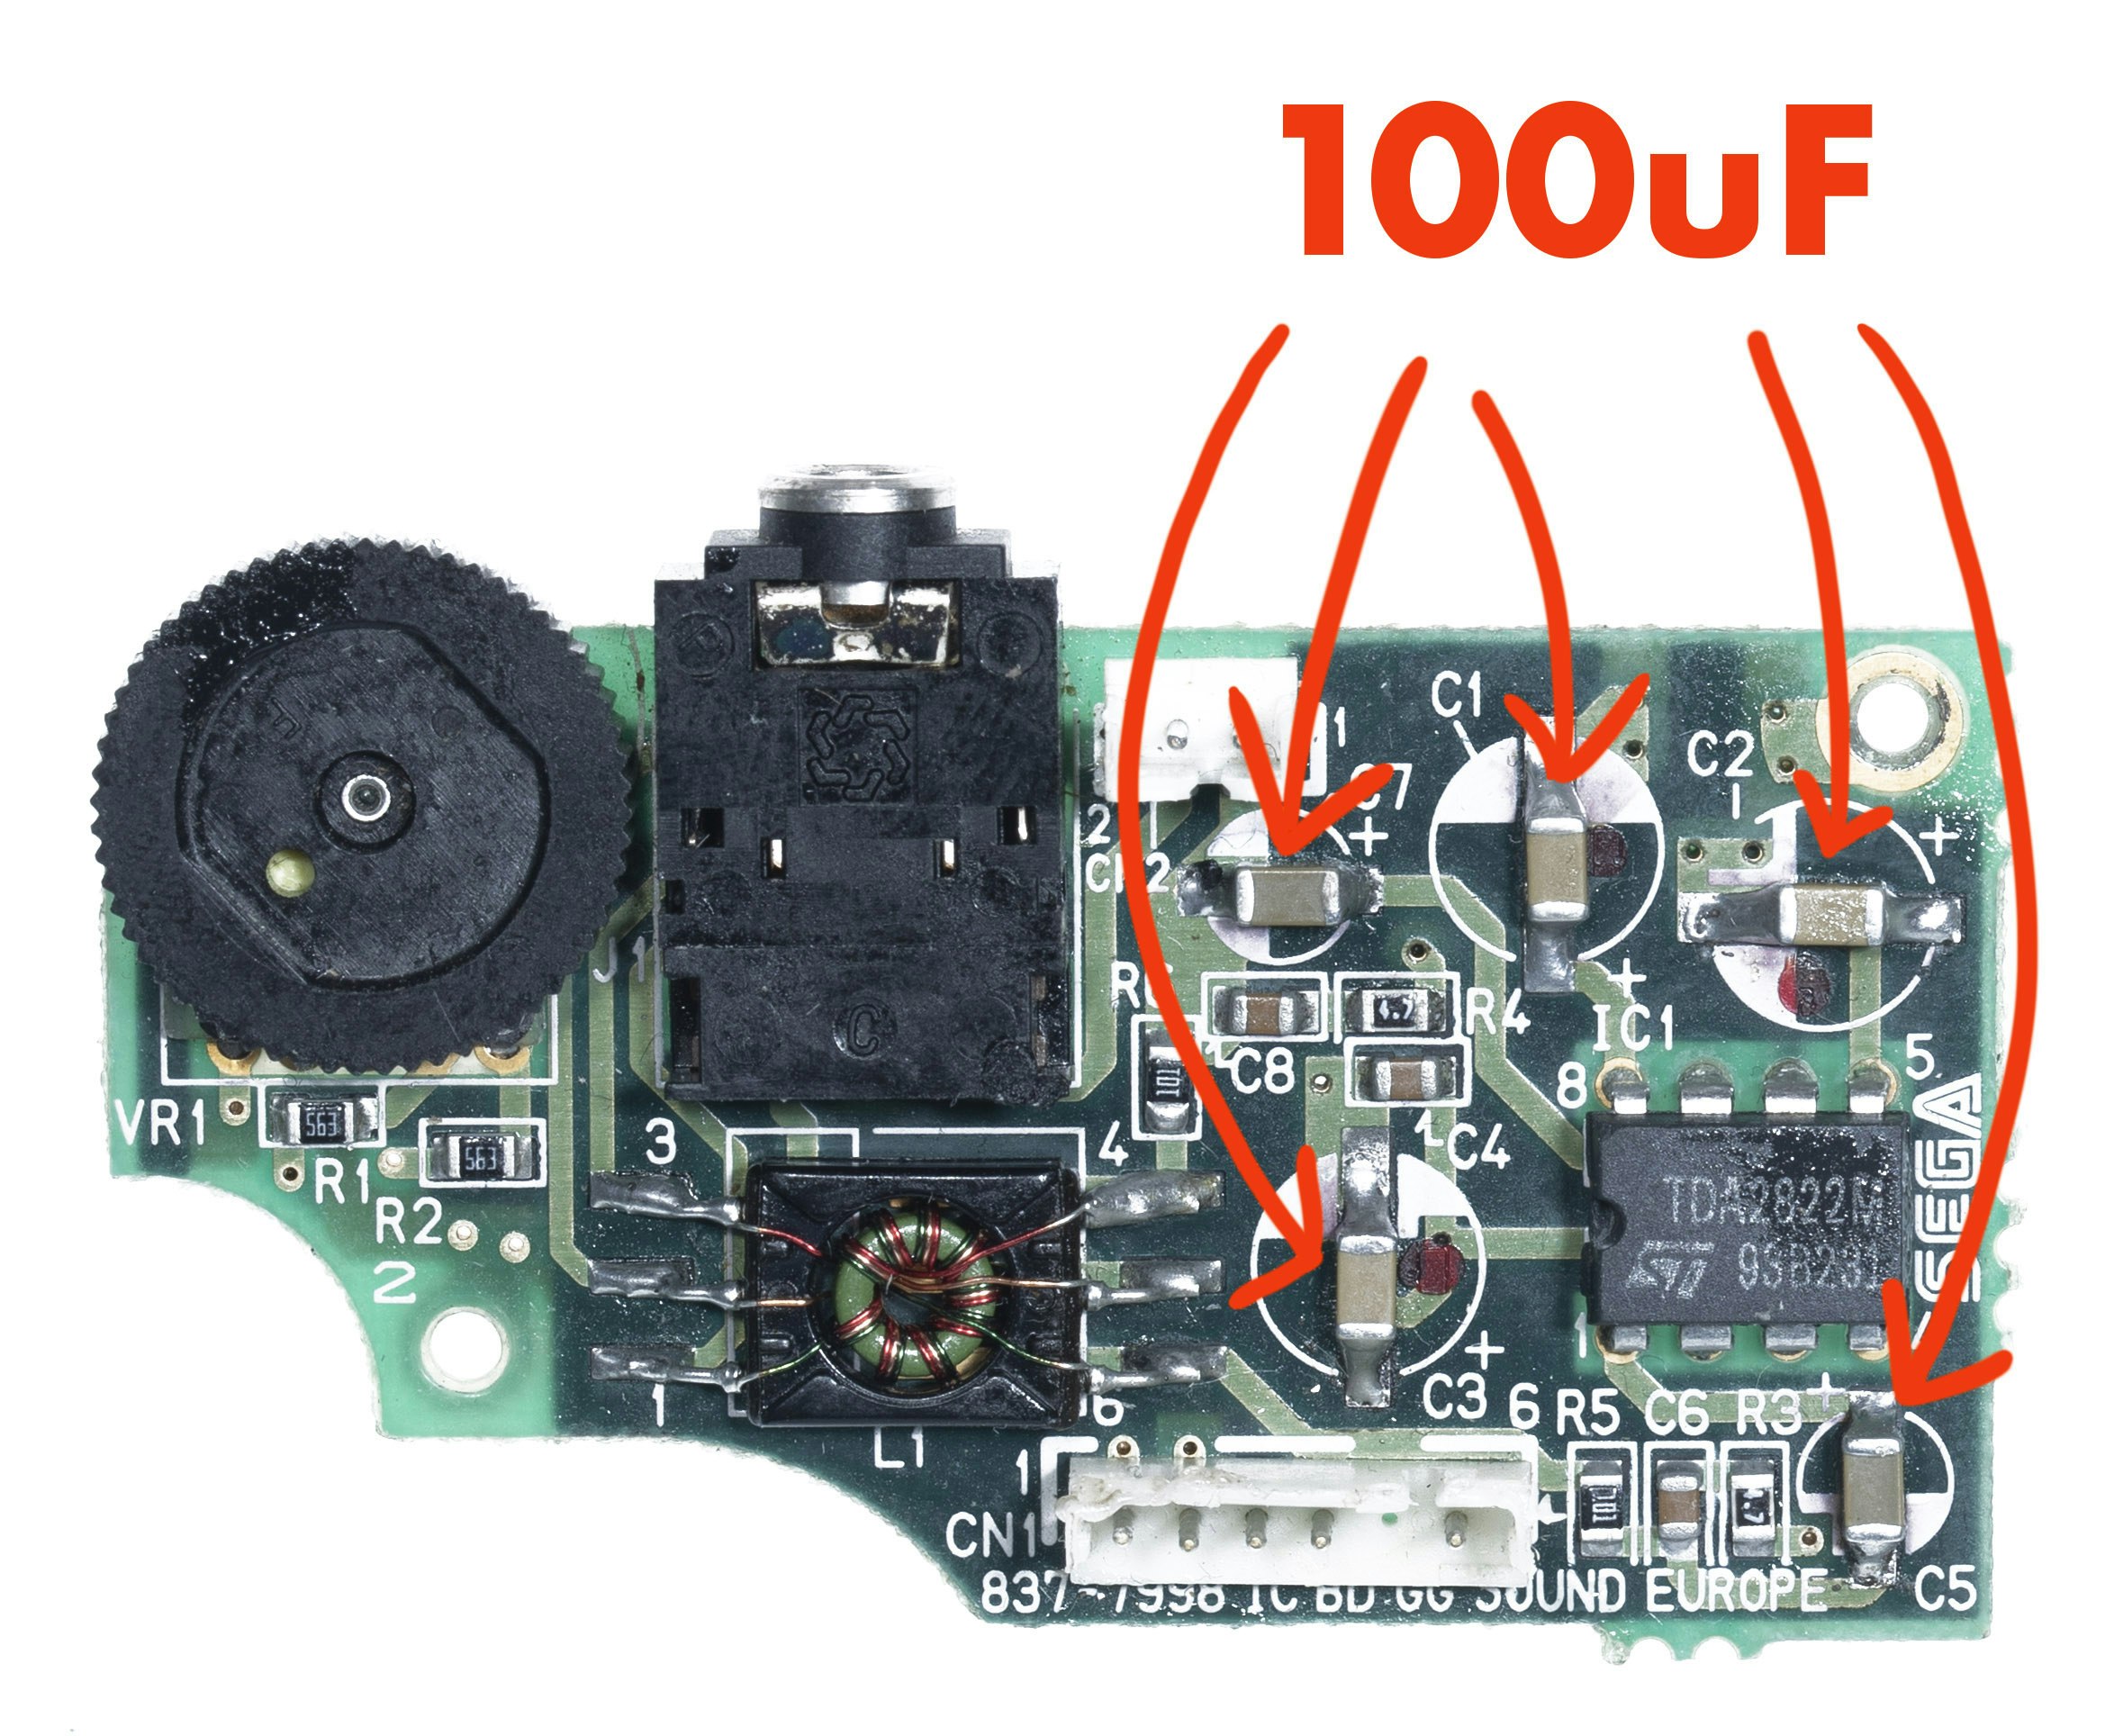
Audio Board
Next up do the same thing for the audio board. Remove the old 5 capacitors, and swap all 5 of them for the capacitor size shown.
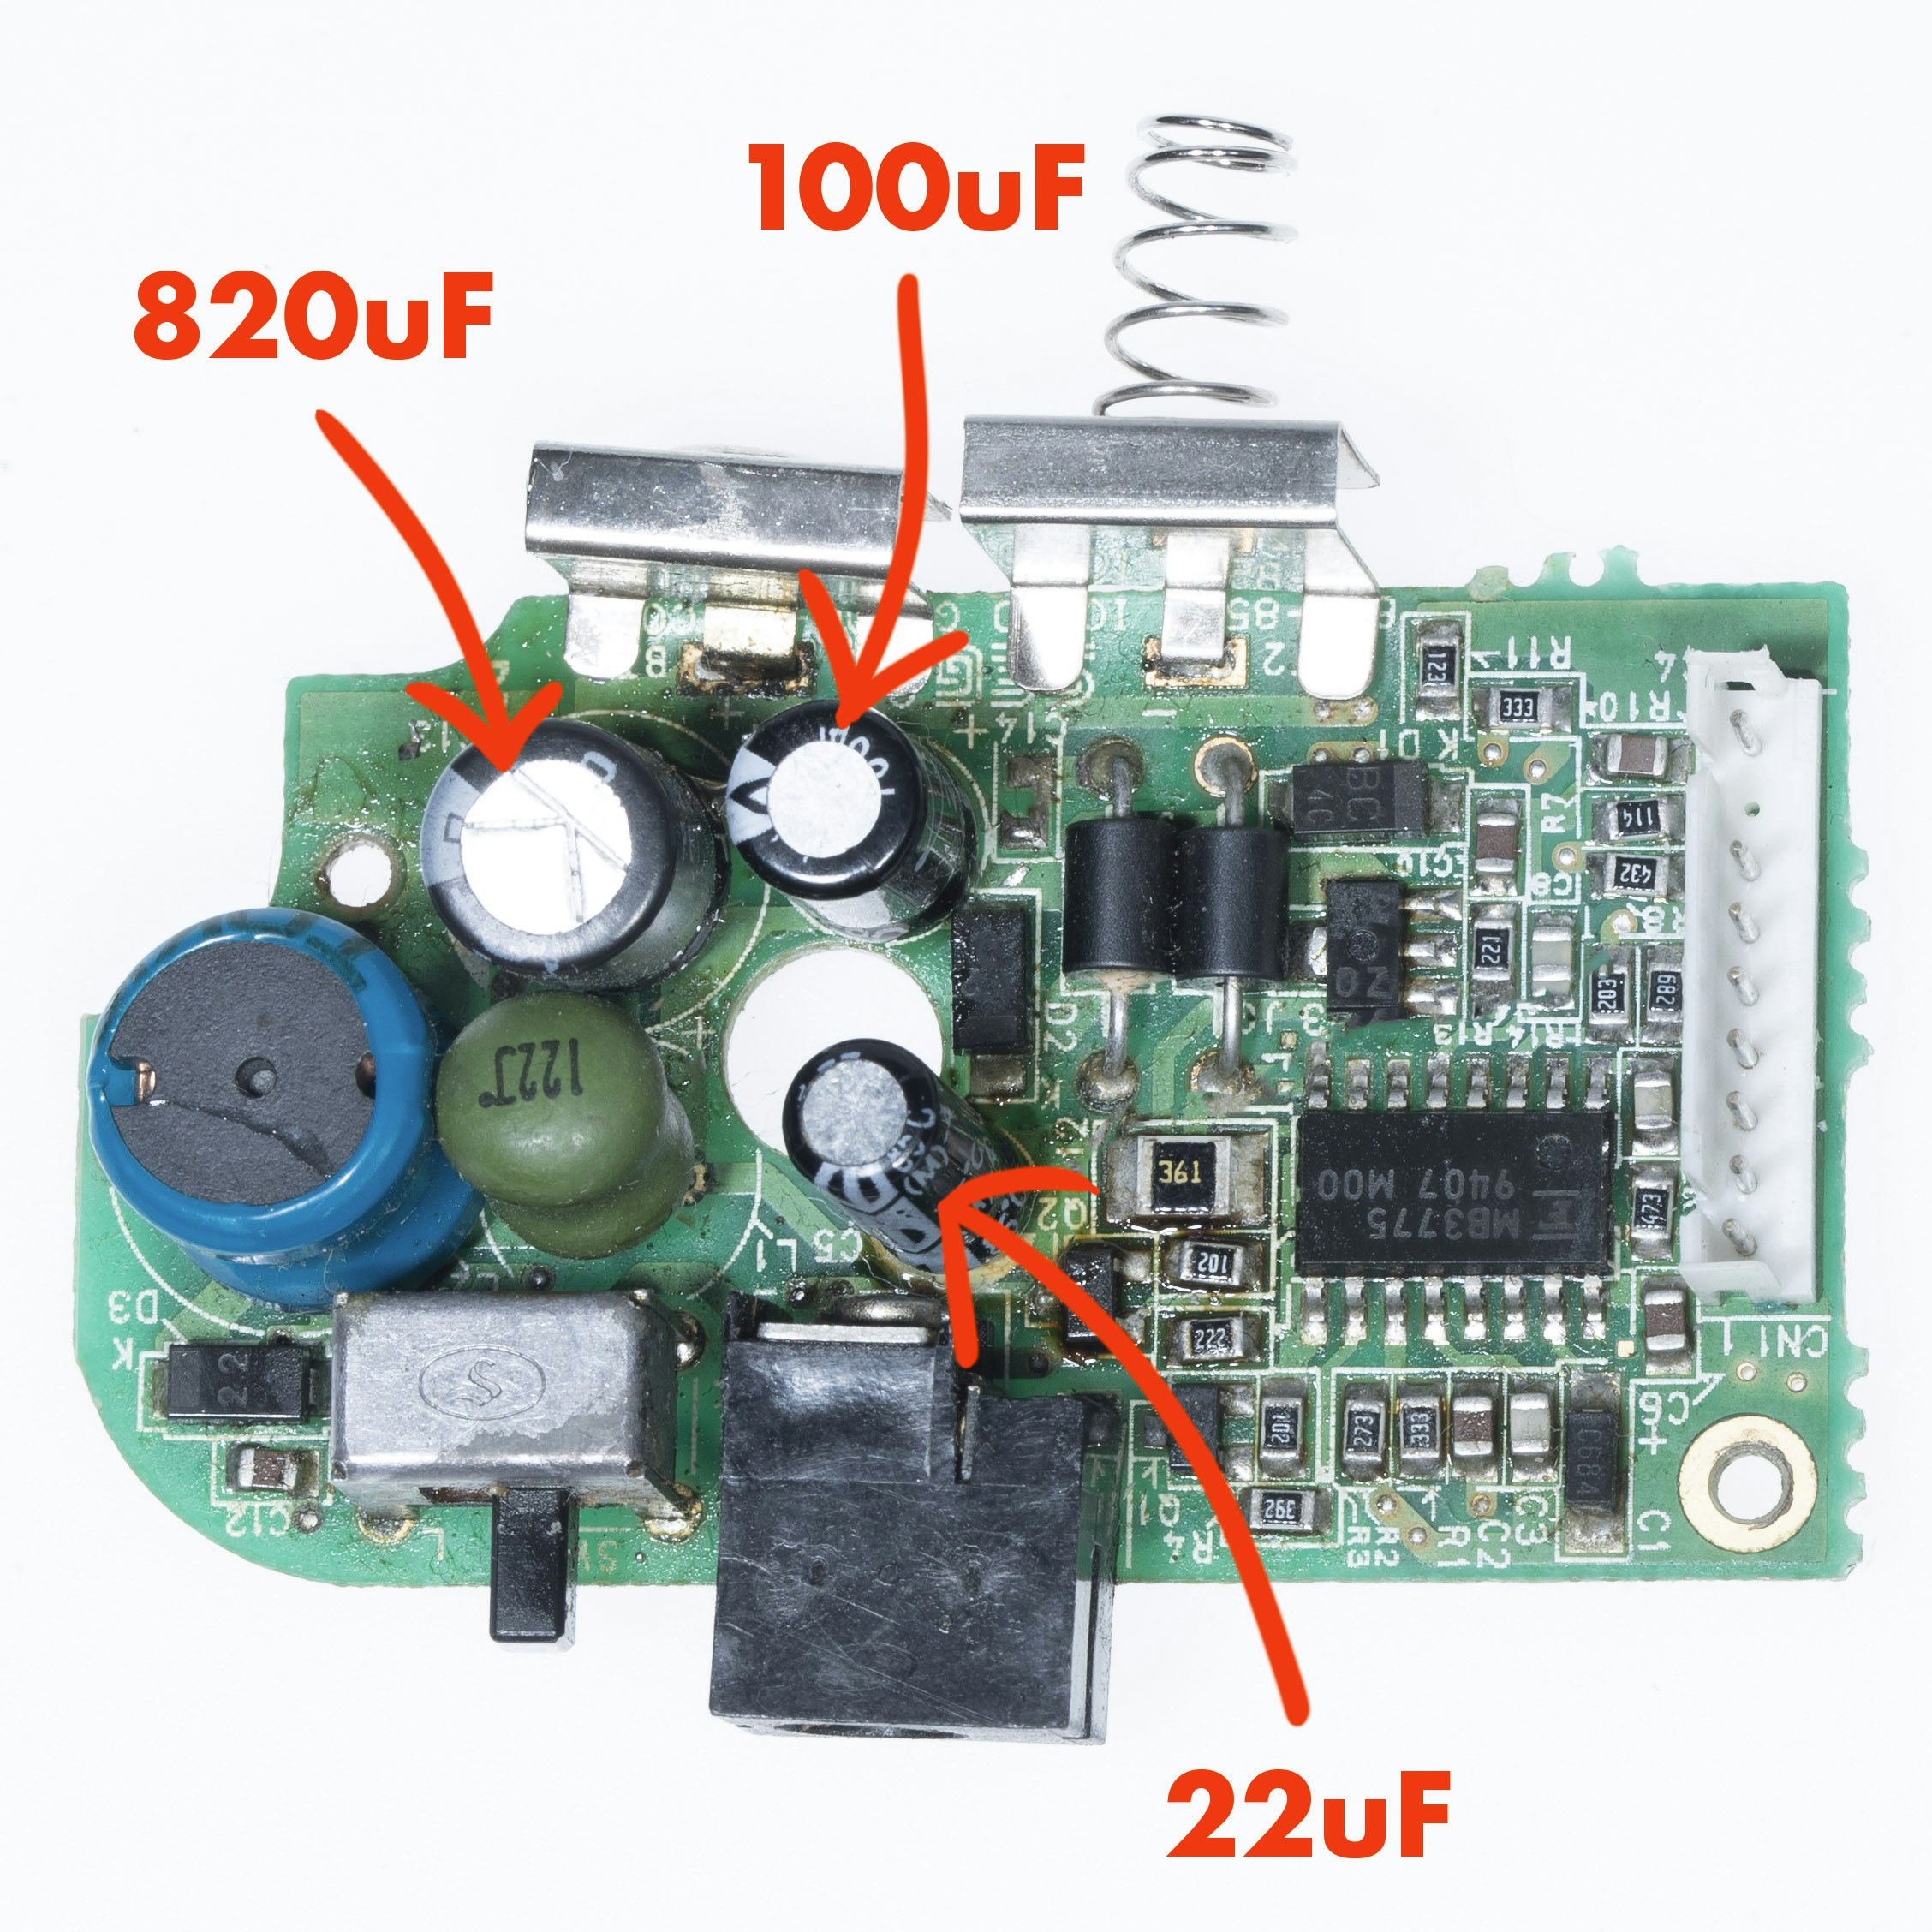
Power Board
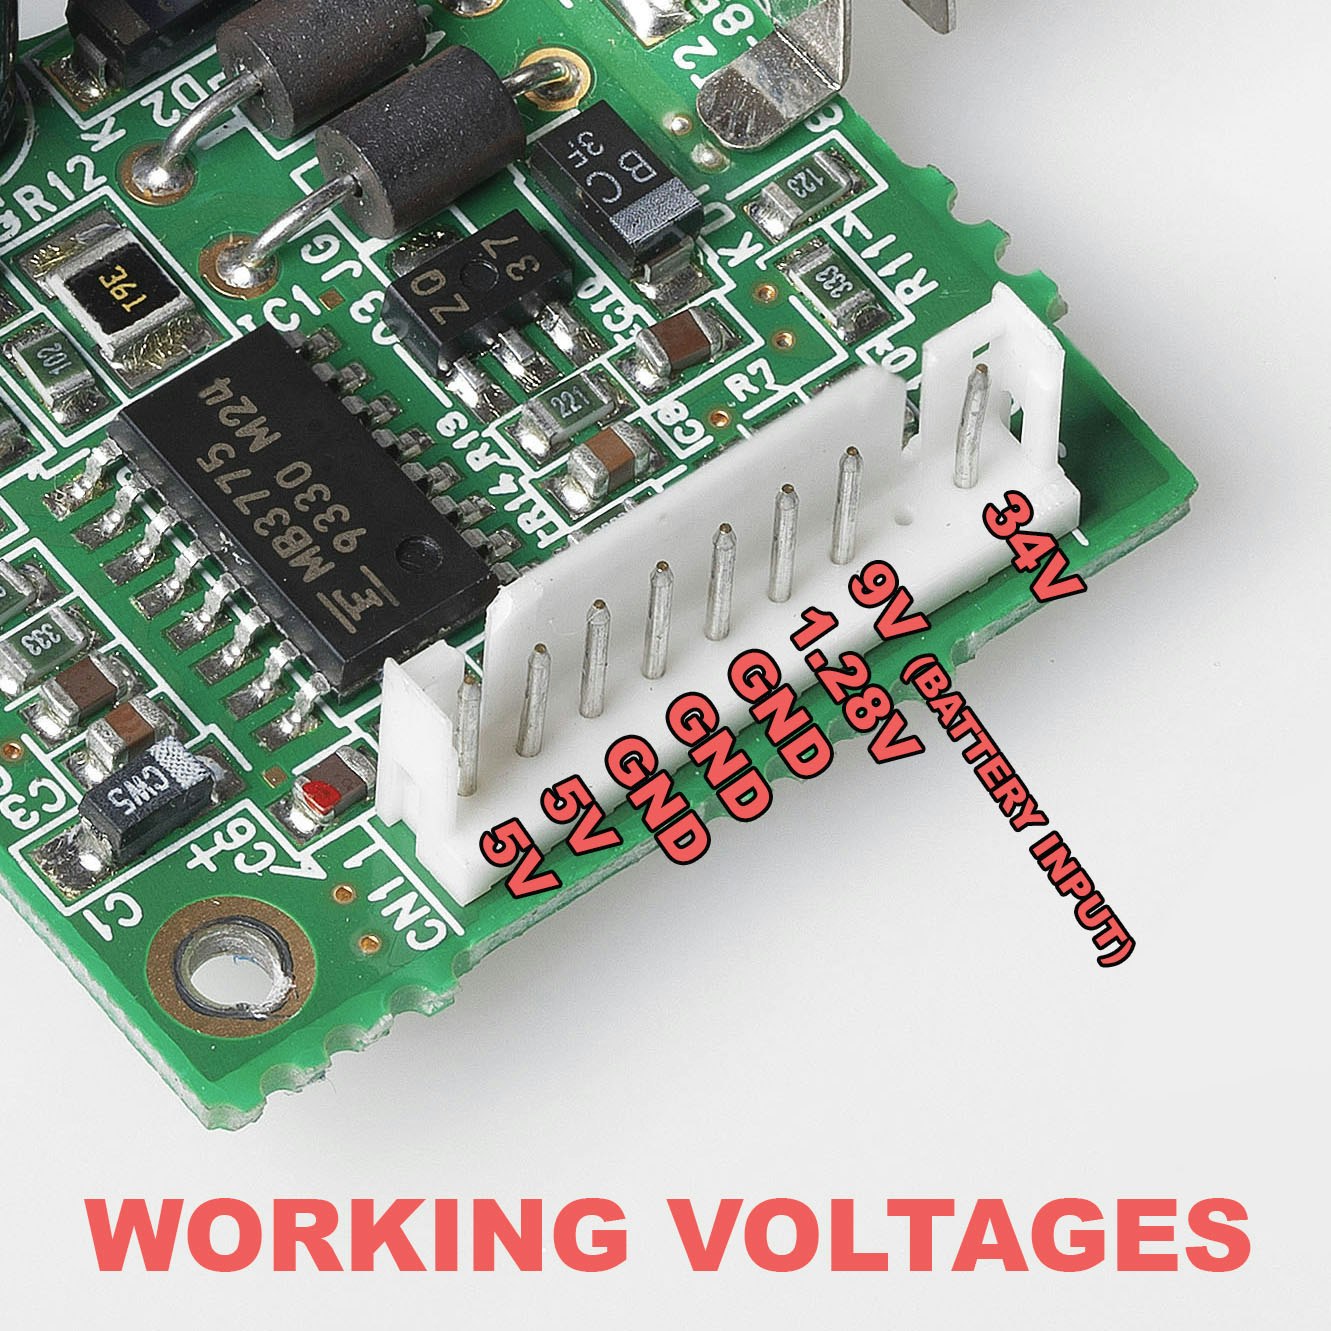
The power board needs the 3 large aluminium capacitors replacing.
Desolder the old ones, and install the new ones. Use a desolder pump and flux to clean the holes where the old ones came from
instead of 820uf use the capacitor of 1000uf
Once done make sure the power from the power board works by checking the voltages with a multimeter